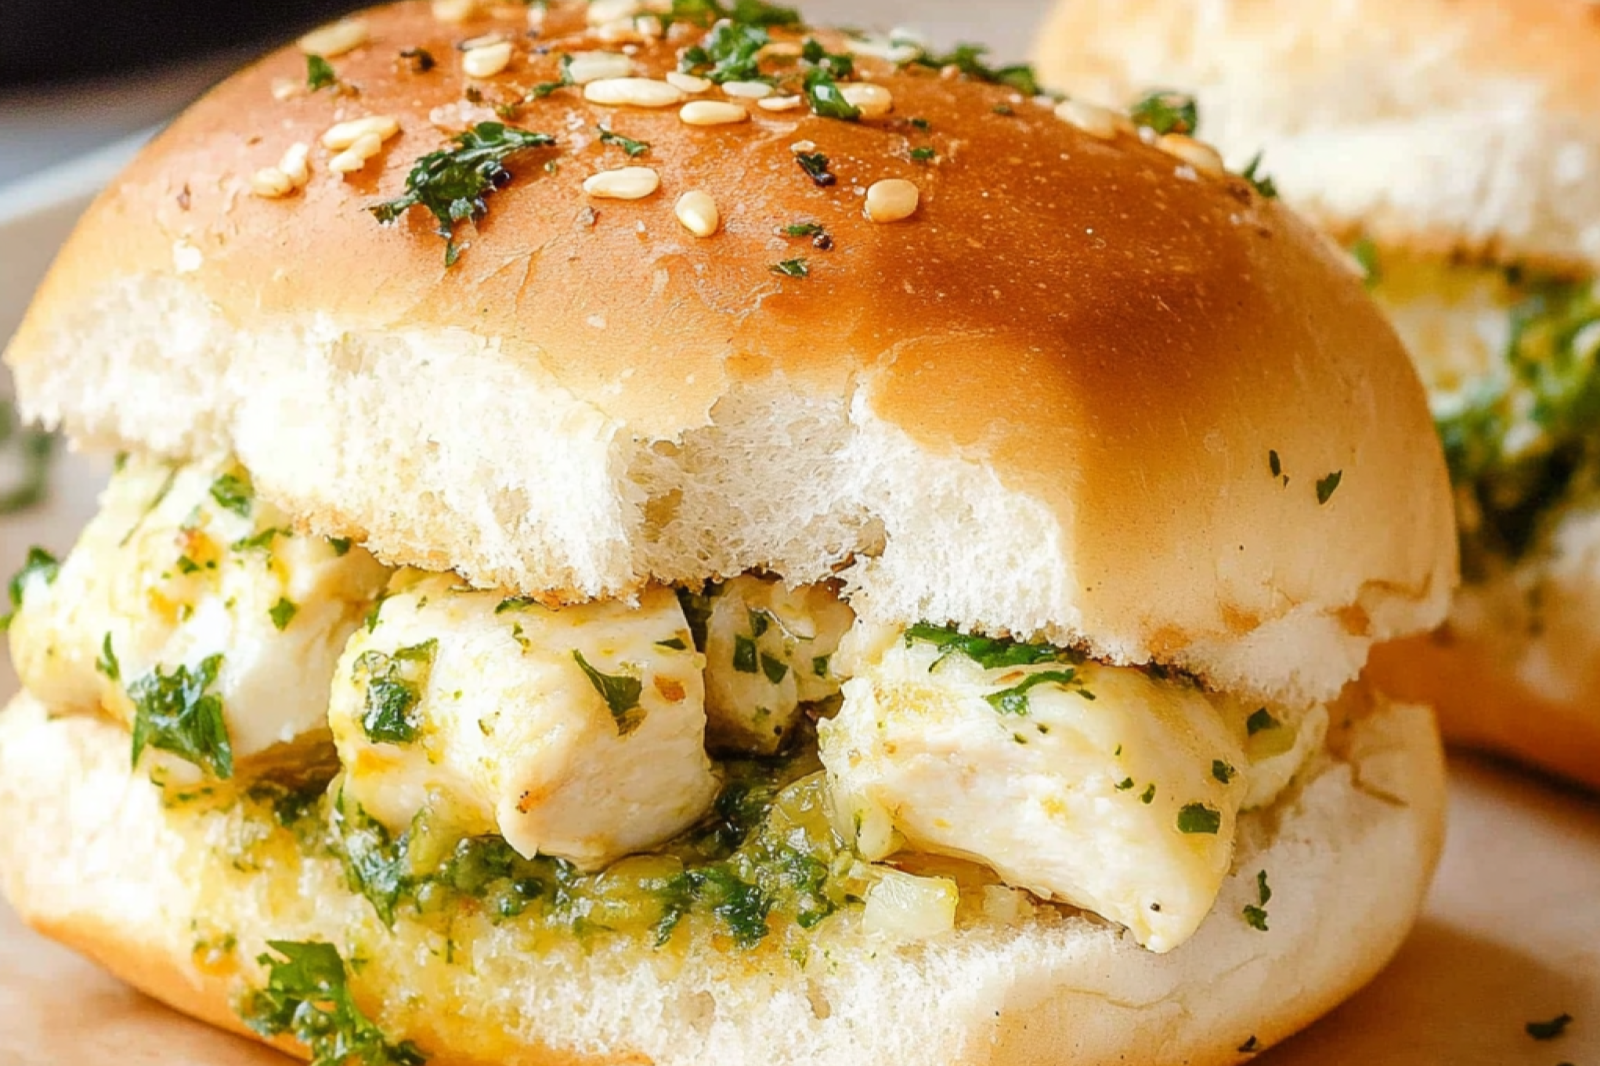
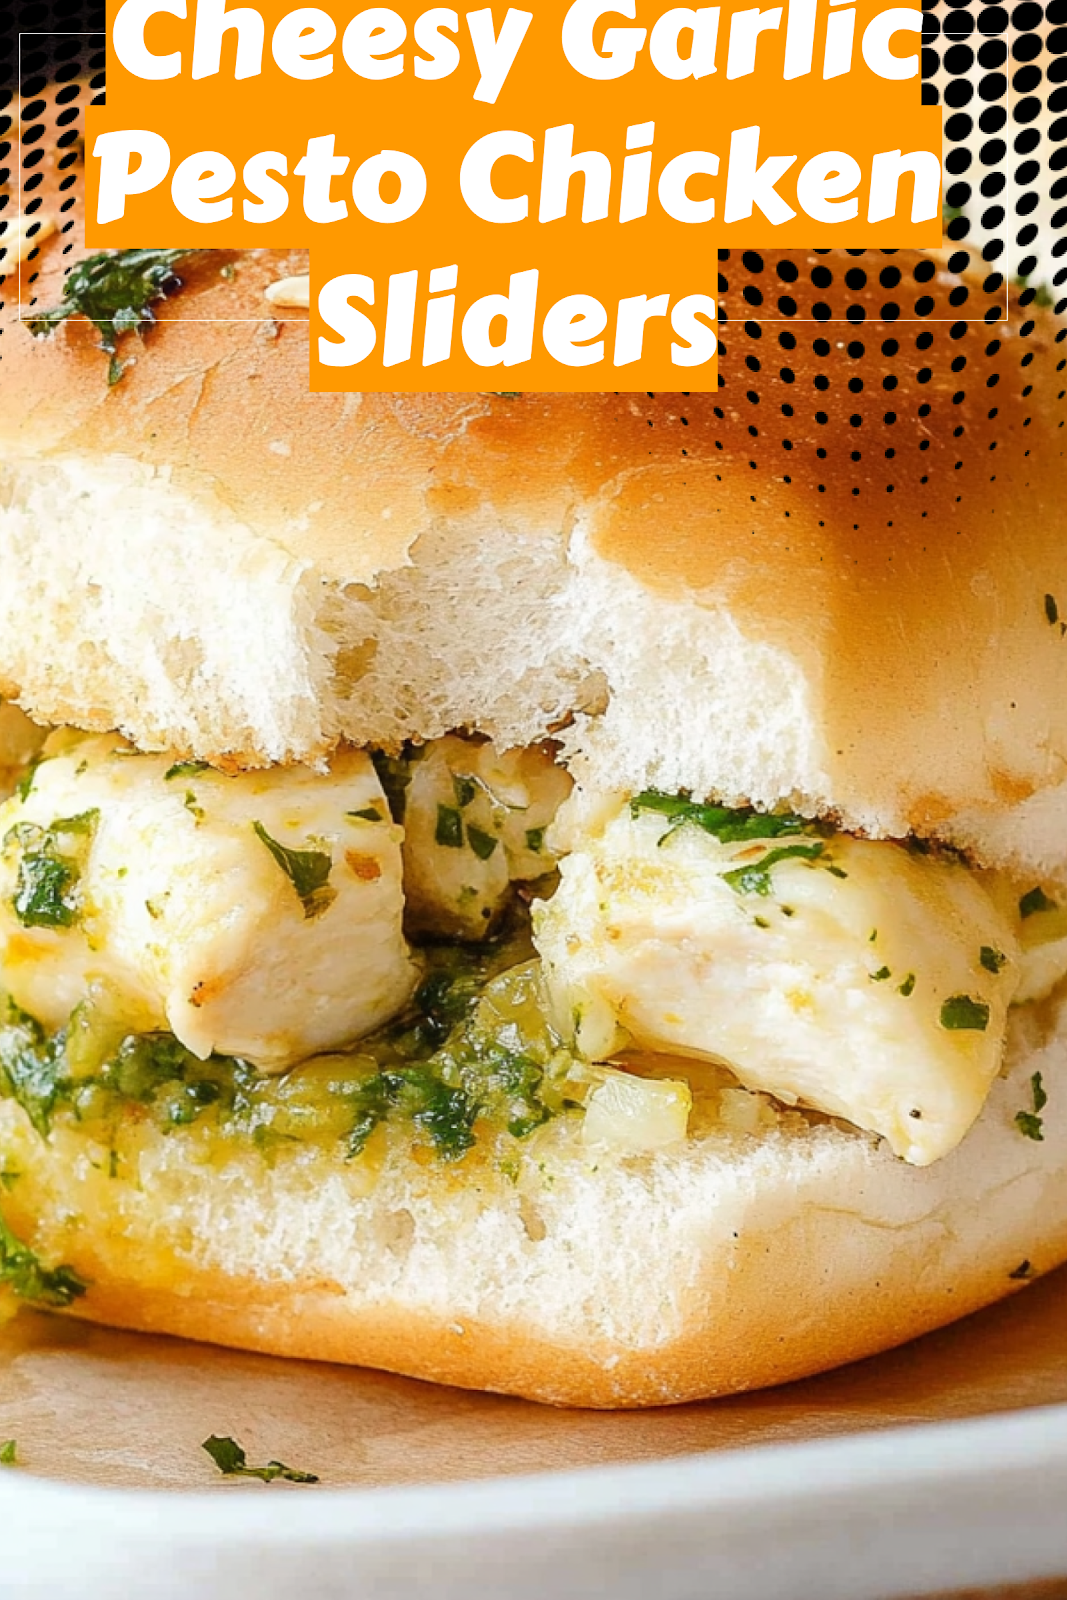
There’s something utterly magical about biting into a warm, cheesy slider that’s bursting with flavor. These Cheesy Garlic Pesto Chicken Sliders have been my go-to crowd-pleaser for years, and I’m so excited to share this recipe with you! The combination of tender chicken, vibrant pesto, melty cheese, and buttery garlic rolls creates an irresistible flavor explosion that will have everyone asking for seconds.
Whether you call them Easy Cheesy Garlic Pesto Chicken Sliders or Homemade Cheesy Garlic Pesto Chicken Sliders, these handheld delights deliver big flavor in a small package. They’re perfect for game days, family gatherings, or simply a cozy night in when you want something special but don’t want to spend hours in the kitchen.
Why You’ll Love These Cheesy Garlic Pesto Chicken Sliders
✅ Ready in just 30 minutes! Perfect for busy weeknights when you need something delicious fast
✅ Incredibly versatile – use leftover chicken or rotisserie chicken for an even quicker prep
✅ Crowd-pleasing favorite – the best way to make Cheesy Garlic Pesto Chicken Sliders at home for parties and gatherings
✅ Budget-friendly yet feels gourmet with the pesto and cheese combination
✅ Kid-approved while still sophisticated enough for adults to enjoy
✅ Easy to customize with your favorite cheese varieties or homemade pesto
✅ Perfect make-ahead option for meal prep or entertaining
The quick and easy Cheesy Garlic Pesto Chicken Sliders recipe combines savory flavors with melty cheese and soft slider buns for an unforgettable bite. What makes these sliders stand out is the garlic butter topping that creates a golden, crispy exterior while keeping the sliders moist and flavorful inside.
Ingredients for Cheesy Garlic Pesto Chicken Sliders
For the Sliders:
- 12-pack Hawaiian sweet rolls (kept intact as a slab)
- 2 cups cooked chicken breast, shredded or diced (rotisserie chicken works great!)
- ⅓ cup basil pesto (store-bought or homemade)
- 2 cups mozzarella cheese, shredded
- 1 cup provolone cheese, shredded (or substitute with more mozzarella)
- ¼ cup grated Parmesan cheese
- ¼ cup sun-dried tomatoes, chopped (optional but highly recommended)
For the Garlic Butter Topping:
- 4 tablespoons butter, melted
- 3 cloves garlic, minced
- 1 tablespoon fresh parsley, finely chopped
- 1 teaspoon Italian seasoning
- ¼ teaspoon salt
- ⅛ teaspoon black pepper
Recipe Notes:
- Dietary Alternatives: Use gluten-free slider buns for a gluten-free option
- Cheese Options: Substitute with dairy-free cheese alternatives for a dairy-free version
- Protein Variations: Turkey, ham, or even chickpeas work great for different flavor profiles
The must-have ingredients for Cheesy Garlic Pesto Chicken Sliders are definitely the pesto and cheese blend, which create that irresistible flavor foundation. The best spices for Cheesy Garlic Pesto Chicken Sliders include garlic, Italian seasoning, and a touch of black pepper to enhance the overall taste experience.
Pin For Later
How to Make Cheesy Garlic Pesto Chicken Sliders – Step by Step
Step 1: Prepare Your Ingredients
Preheat your oven to 350°F (175°C) and lightly grease a 9×13 inch baking dish. Gather all your ingredients and ensure your chicken is cooked and shredded or diced into small pieces. Mix your chicken with the pesto in a medium bowl until well combined.
Step 2: Prepare the Slider Base
Keep the slider rolls connected and use a large serrated knife to slice horizontally through the middle of the entire slab of rolls. Place the bottom half in your prepared baking dish.
Step 3: Layer the Fillings
Layer your ingredients in this order for maximum flavor:
- Spread half of the mozzarella cheese on the bottom buns
- Distribute the pesto-chicken mixture evenly
- Sprinkle the sun-dried tomatoes (if using)
- Add the provolone cheese layer
- Top with remaining mozzarella and the Parmesan cheese
Step 4: Add the Top Buns
Place the top half of the slider rolls over the cheese layer, creating a sandwich.
Step 5: Prepare the Garlic Butter Topping
In a small bowl, combine the melted butter, minced garlic, parsley, Italian seasoning, salt, and pepper. Whisk until well combined.
Step 6: Add the Finishing Touch
Using a pastry brush or spoon, generously spread the garlic butter mixture over the tops of the rolls. Make sure to get the butter into all the nooks and crannies for maximum flavor.
Step 7: Bake to Perfection
Cover the baking dish with aluminum foil and bake for 15 minutes. Then remove the foil and bake for an additional 5-7 minutes until the tops are golden brown and the cheese is fully melted and bubbly.
Step 8: Serve
Let the sliders cool for 5 minutes before cutting them into individual portions. This helps the cheese set slightly and makes serving easier.
Pro Tip: For an extra golden finish, brush a little more butter on top during the last few minutes of baking!
Pro Tips for the Best Cheesy Garlic Pesto Chicken Sliders
Want to elevate your sliders from great to absolutely amazing? Here are my tried-and-true tricks:
- Use room temperature cheese – It melts more evenly than cold cheese straight from the fridge.
- Don’t skimp on the garlic butter – This is what creates that irresistible aroma and flavor on top of the sliders.
- Mix cheeses for depth of flavor – The combination of mozzarella, provolone, and Parmesan creates the perfect cheese pull and flavor profile.
- Toast the inside of the buns – For extra texture, lightly toast the inside of the buns before adding the fillings.
- Let the sliders rest – Those 5 minutes of cooling time are crucial for the flavors to meld and the cheese to set slightly.
Can I prepare Cheesy Garlic Pesto Chicken Sliders ahead?
Absolutely! You can assemble these sliders up to 24 hours in advance. Simply cover with plastic wrap and refrigerate. When ready to bake, remove from the refrigerator while the oven preheats, and you may need to add 5-7 minutes to the covered baking time.
What makes Cheesy Garlic Pesto Chicken Sliders extra special?
The combination of three cheeses along with the basil pesto creates incredible depth of flavor. The garlic butter topping adds that final touch that makes these sliders truly unforgettable.
Best Ways to Serve Cheesy Garlic Pesto Chicken Sliders
The best way to serve Cheesy Garlic Pesto Chicken Sliders is while they’re still warm, when the cheese is at its meltiest and most delicious. Here are some perfect pairings and occasions:
Perfect Side Dishes:
- Fresh green salad with balsamic vinaigrette
- Crispy roasted potatoes
- Italian pasta salad
- Tomato soup for a soup-and-sandwich combo
- Sweet potato fries
Ideal Occasions:
- Game day gatherings
- Birthday parties
- Family movie nights
- Casual dinner parties
- Potluck contributions
- Holiday appetizers
Beverage Pairings:
- Italian sodas
- Cold craft beer
- Sparkling lemonade
- Chianti or Pinot Grigio for wine lovers
- Iced tea with lemon
For a complete meal experience, try adding a fresh green side and a light dessert. The combination of warm, savory sliders with crisp veggies creates a perfectly balanced meal.
Nutritional Information
These Cheesy Garlic Pesto Chicken Sliders are as satisfying as they are delicious. Here’s the nutritional breakdown per slider (based on 12 sliders):
- Calories: 275 per slider
- Protein: 16g
- Carbohydrates: 18g
- Fat: 15g
- Fiber: 1g
- Sugar: 4g
- Sodium: 480mg
For a lighter version: Use reduced-fat cheese, whole wheat slider buns, and a light butter substitute to reduce the calorie and fat content without sacrificing too much flavor.
Low-carb version available! Skip the buns and turn this into a chicken pesto bake by layering the ingredients in a baking dish and serving with a side of vegetables.
Storage & Leftovers
Wondering how to store Cheesy Garlic Pesto Chicken Sliders leftovers? These sliders keep remarkably well and can even be frozen for future enjoyment!
Refrigerator Storage:
Place leftover sliders in an airtight container or wrap tightly with aluminum foil. Refrigerate for up to 3 days.
Freezer Storage:
For longer storage, wrap individual sliders in plastic wrap, then place in a freezer-safe container or zip-top bag. Freeze for up to 1 month.
Reheating Instructions:
- From refrigerated: Wrap in foil and warm in a 325°F oven for 10-15 minutes until heated through. For a crispier top, remove the foil for the last 2-3 minutes.
- From frozen: Thaw overnight in the refrigerator, then follow the refrigerated reheating instructions. Alternatively, reheat from frozen by baking at 325°F for 20-25 minutes covered, then uncovered for 5 minutes.
Pro Tip: Add a small pat of butter on top when reheating to restore moisture and flavor!
FAQs About Cheesy Garlic Pesto Chicken Sliders
Can I use homemade pesto for these Cheesy Garlic Pesto Chicken Sliders?
Absolutely! Homemade pesto will take these sliders to the next level. Use your favorite basil pesto recipe or try variations like sun-dried tomato pesto or arugula pesto for a different twist.
What’s the best type of chicken to use in this recipe?
Rotisserie chicken offers convenience and flavor, but any cooked chicken works well. Leftover grilled, baked, or poached chicken breast is perfect. You can even use canned chicken in a pinch!
Can I make these sliders without pesto?
Yes! If you don’t have pesto or prefer not to use it, you can substitute with 2 tablespoons of olive oil mixed with 1 tablespoon of Italian herbs, or use a thin layer of tomato sauce or alfredo sauce.
How do I prevent the bottoms of my sliders from getting soggy?
To prevent soggy bottoms, create a barrier between the chicken mixture and the bottom bun by laying a thin layer of cheese on the bottom buns first. Another trick is to lightly toast the inside of the buns before assembling.
Conclusion
These Best Cheesy Garlic Pesto Chicken Sliders bring together all the elements of a perfect handheld treat: soft, buttery rolls, flavorful pesto-infused chicken, and a trio of melty cheeses, all topped with a garlic butter that takes them over the top. They’re simple enough for weeknight dinners but special enough for celebrations and gatherings.
What I love most about this recipe is its versatility and reliability – it never fails to impress, whether I’m feeding picky kids or discerning adults. The balance of flavors and textures creates something truly greater than the sum of its parts.
I hope you’ll try these Cheesy Garlic Pesto Chicken Sliders for your next gathering or family meal. If you do, I’d love to hear how they turned out! Did you make any modifications? What sides did you serve them with? Share your experience in the comments below!
Don’t forget to pin this recipe for later and share it with friends and family who appreciate good food made simple. After all, the best recipes are the ones we share!
Print
Cheesy Garlic Pesto Chicken Sliders Recipe Delights
- Total Time: 30 minutes
- Yield: 12 sliders 1x
Description
The best Cheesy Garlic Pesto Chicken Sliders recipe combines juicy chicken, vibrant pesto, and melty cheese between buttery garlic rolls for an irresistible bite, perfect for busy weeknights or entertaining.
Ingredients
- 12-count package of Hawaiian sweet rolls
- 2 cups shredded rotisserie chicken
- 1 cup basil pesto
- 2 cups shredded mozzarella cheese
- 1/2 cup grated Parmesan cheese
- 1/4 cup mayonnaise
- 1/2 cup roasted red peppers (drained and chopped)
- Fresh baby spinach leaves
- 4 tablespoons salted butter (melted)
- 2 cloves garlic, minced
- 1 tablespoon fresh parsley, chopped
- 1/2 teaspoon Italian seasoning
- 1/4 teaspoon crushed red pepper flakes (optional)
Instructions
- Preheat oven to 350°F (175°C) and grease a 9×13-inch baking dish. Slice the rolls horizontally without separating them individually.
- Place the bottom halves of the rolls in the dish. In a bowl, mix chicken with 1/2 cup pesto and mayonnaise. Spread evenly over the rolls.
- Layer roasted red peppers and spinach over the chicken, then sprinkle with mozzarella, the remaining pesto, and Parmesan cheese.
- Place the top halves of the rolls on top and press gently.
- Combine melted butter, garlic, parsley, Italian seasoning, and red pepper flakes. Brush the mixture generously over the tops of the rolls.
- Cover with foil and bake for 15 minutes. Uncover and bake an additional 5–7 minutes until the tops are golden brown and the cheese is melted.
- Cool slightly for 5 minutes, slice into individual sliders, and serve warm.
Notes
- Store leftovers in an airtight container for up to 3 days in the fridge.
- Sliders freeze well wrapped tightly; reheat in the oven for best texture.
- Substitute whole wheat rolls for extra fiber and nutrition.
- Prep Time: 10 minutes
- Cook Time: 20 minutes
- Category: Main Course
- Method: Baking
- Cuisine: American
Nutrition
- Serving Size: 1 slider
- Calories: 285 kcal
- Sugar: 4 g
- Sodium: 410 mg
- Fat: 17 g
- Saturated Fat: 7 g
- Unsaturated Fat: 9 g
- Trans Fat: 0 g
- Carbohydrates: 18 g
- Fiber: 1 g
- Protein: 14 g
- Cholesterol: 45 mg



Leave a Reply