
Key Takeaways
- Complete recipe with step-by-step instructions
- Nutritional information included
- Tips for best results
- Storage and reheating guidelines
Published: August 29, 2025 |
Last Updated: August 29, 2025 |
Prep Time: See recipe below
Quick Recipe Overview
Prep: 30 min
Cook: 45 min
Serves: 8
Difficulty: Easy
Creamy cook ice cream has always felt like a special treat to me, conjuring up memories of summer evenings and happy family gatherings. The first time I successfully made a homemade creamy ice cream base, I was amazed at how simple yet decadent it was. It’s honestly rewarding figuring out how to make creamy ice cream from scratch that tastes just like the gourmet stuff but is made with love right in your own kitchen. You’ll be surprised by how easy it is to get that just right, smooth texture. Let’s get cooking!
Why You’ll Love This Creamy Cook Ice Cream
This recipe is a winner for so many reasons:
- Incredibly rich and smooth flavor that will impress everyone.
- Super fast prep time – just minutes to get started!
- It’s an easy creamy ice cream recipe that anyone can master.
- You control the ingredients, making it a healthier dessert option.
- Budget-friendly compared to store-bought gourmet ice creams.
- A fantastic family-friendly activity that kids adore participating in.
- It’s the ideal base for an easy creamy ice cream recipe, ready for your favorite add-ins.
- Enjoy that satisfying feeling of making delicious ice cream from scratch.
Ingredients for Creamy Cook Ice Cream
Gathering these simple items is the first step to achieving the best creamy ice cream base ingredients. This recipe relies on just a few pantry staples to create that remarkable smooth texture without any cooking.
- 2 cups heavy cream – This is essential for that luxurious, rich texture we’re aiming for.
- 1 cup whole milk – Whole milk helps to balance the richness of the cream and ensures everything blends smoothly.
- ½ to ¾ cup granulated sugar – Adjust this to your sweetness preference; it’s key for both flavor and texture.
- 1 tablespoon vanilla extract – A classic flavor enhancer that really makes the ice cream sing.
- Pinch of salt – Don’t skip this! Salt balances the sweetness and amplifies the other flavors.
How to Make Creamy Cook Ice Cream
This simple creamy ice cream method is so straightforward, you’ll wonder why you ever bought ice cream from the store! While this recipe doesn’t require actual cooking, the process of combining the ingredients and chilling is crucial for the final texture, similar to how a custard-based ice cream recipe develops its richness.
- Step 1: In a medium bowl, whisk together the 2 cups heavy cream, 1 cup whole milk, your chosen amount of granulated sugar (½ to ¾ cup), 1 tablespoon vanilla extract, and a pinch of salt. Whisk until the sugar is completely dissolved. You should feel the grit disappear between your fingers.
- Step 2: For the best results and an even colder base, cover the bowl and chill the mixture in the refrigerator for at least 30 minutes, or up to 24 hours. This helps the ice cream maker work more efficiently and contributes to a smoother texture.
- Step 3: Pour the chilled cream mixture into your ice cream maker’s frozen canister. Let it churn according to the manufacturer’s instructions, which usually takes about 20 minutes. You’re looking for a consistency similar to soft-serve ice cream.
- Step 4: Once churned, the ice cream will be soft. For a firmer texture, transfer the churned mixture into an airtight container. Press a piece of parchment paper directly onto the surface to prevent ice crystals, then cover tightly. Freeze for at least 2 hours before serving.

Pro Tips for the Best Creamy Cook Ice Cream
Want to elevate your homemade ice cream game? These little tricks will ensure your creamy cook ice cream is certainly excellent every time.
- Always use high-quality, full-fat dairy for the richest flavor and smoothest texture.
- Chill your ice cream maker’s bowl overnight before you plan to churn. A colder bowl means faster churning and fewer ice crystals.
- Don’t overfill your ice cream maker; the mixture expands as it freezes.
- For the smoothest finish, press parchment paper directly onto the surface of the ice cream before freezing to prevent ice crystals.
What’s the secret to great creamy cook ice cream?
The magic lies in the simplicity and quality of the ingredients. Using a optimal balance of heavy cream and whole milk, along with sugar and vanilla, creates a rich, smooth base. It’s a testament to how a well-balanced cooked ice cream base recipe can yield extraordinary results without complex steps.
Can I make creamy cook ice cream ahead of time?
Really! You can prepare the base mixture and store it in the refrigerator for up to 24 hours before churning. Just make sure it’s well-covered to prevent any off-flavors.
How do I avoid common mistakes with creamy cook ice cream?
A common pitfall is not chilling the base enough, leading to a softer churn. Also, avoid over-churning, which can make the ice cream icy. Ensure your ice cream maker is properly frozen. For more on preventing ice crystals, check out this guide on how to make ice cream creamy.
Best Ways to Serve Creamy Cook Ice Cream
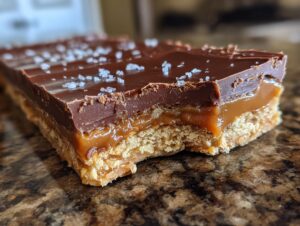
This versatile creamy cook ice cream is a blank canvas for deliciousness! Serve it merely in a bowl, letting its pure, smooth flavor shine. For a classic treat, pair it with warm apple pie or a rich chocolate brownie; the hot dessert and cold ice cream are a match made in heaven. You can also think of it as a base, much like a custard-based ice cream recipe, and swirl in caramel, hot fudge, or fresh fruit purees after churning. It’s also marvelous topped with chopped nuts or a sprinkle of flaky sea salt to enhance the sweet creaminess.
Nutrition Facts for Creamy Cook Ice Cream
Per serving (recipe makes approximately 4 servings, about 1/4 quart each):
- Calories: 450
- Fat: 30g
- Saturated Fat: 18g
- Protein: 4g
- Carbohydrates: 40g
- Fiber: 0g
- Sugar: 38g
- Sodium: 50mg
Nutritional values are estimates and may vary based on specific ingredients used and serving size.

How to Store and Reheat Creamy Cook Ice Cream
Proper storage is key to achieving creamy ice cream texture long after you’ve made it. Once your delicious creamy cook ice cream is churned, let it sit at room temperature for about 5-10 minutes before transferring it to an airtight container. This brief rest helps prevent it from becoming too hard. For the best results, press a piece of parchment paper or wax paper directly onto the surface of the ice cream before sealing the container. This creates a barrier against air, which helps minimize ice crystal formation and maintain that great smooth quality. Stored this way, your ice cream should stay fresh in the freezer for up to 3 months. If you need to soften it quickly before serving, just let it sit on the counter for a few minutes. There’s no need to reheat this frozen treat, just let it soften!
Frequently Asked Questions About Creamy Cook Ice Cream
What makes this creamy cook ice cream recipe so good?
The magic lies in the simplicity and quality of the ingredients. Using a just right balance of heavy cream and whole milk, along with sugar and vanilla, creates a rich, smooth base. It’s a testament to how a well-balanced cooked ice cream base recipe can yield exceptional results without complex steps.
Can I use this as a base for other flavors?
Really! Think of this as your starting point for endless flavor adventures. Once you’ve mastered the basic smooth creamy ice cream cooking tips, feel free to add fruit purees, chocolate chips, cookie dough, or coffee extract after churning. It’s incredibly adaptable!
Why is my homemade ice cream not creamy?
Often, this comes down to ice crystal formation. Ensure your ice cream maker’s bowl is frozen solid, and chill your base thoroughly before churning. Pressing parchment paper directly onto the surface before freezing also helps immensely with smooth creamy ice cream cooking tips, preventing air exposure.
Is a cooked ice cream base better than a no-cook one?
A traditional cooked ice cream base recipe, often involving tempering eggs (a custard base), can yield an exceptionally rich and stable texture. Although, this no-cook method offers impressive creaminess with much less effort, making it ideal for busy home cooks. Both are delicious!
Variations of Creamy Cook Ice Cream You Can Try
Once you’ve mastered the basic creamy cook ice cream, the possibilities are genuinely endless! You can adapt this recipe for different dietary needs or explore different preparation methods. For a lighter, egg-free option that still delivers great texture, consider this a simplified version of a Philadelphia-style ice cream base. If you don’t have an ice cream maker, you can easily adapt this into a no-churn creamy ice cream base by whipping the cream to stiff peaks before folding in the other ingredients and freezing. Try adding fresh fruit purees, melted chocolate, or even a swirl of caramel or peanut butter after churning for one-of-a-kind flavor combinations.
Print
Creamy Cook Ice Cream: 2 Amazing Steps
- Total Time: 25 minutes
- Yield: About 1 quart 1x
- Diet: Vegetarian
Description
A simple, no-cook ice cream base that’s quick to prepare, endlessly adaptable, and results in a rich, smooth, and delicious frozen dessert. Perfect for customizing with your favorite mix-ins.
Ingredients
- 2 cups heavy cream
- 1 cup whole milk
- ½ to ¾ cup granulated sugar
- 1 tablespoon vanilla extract
- Pinch of salt
Instructions
- In a medium bowl, whisk together the heavy cream, whole milk, sugar, vanilla extract, and a pinch of salt until the sugar is completely dissolved.
- For extra coldness, chill the mixture in the refrigerator before churning (optional).
- Pour the mixture into your ice cream maker.
- Churn according to the machine’s instructions, typically about 20 minutes, until it reaches a soft-serve consistency.
- For firmer ice cream, transfer the churned mixture to an airtight container and freeze for at least 2 hours before serving.
Notes
- This recipe is egg-free and generally safe for kids and those avoiding raw eggs.
- For best texture, let the ice cream sit at room temperature for 5–10 minutes before scooping.
- Store ice cream in an airtight container in the freezer for up to 2 weeks.
- Non-dairy milk like full-fat coconut milk or oat milk can be used, but the texture may be less rich.
- Sugar can be reduced, or sugar substitutes can be used if they dissolve completely.
- Prep Time: 5 minutes
- Cook Time: No cooking required
- Category: Desserts
- Method: Ice Cream Maker
- Cuisine: American
Nutrition
- Serving Size: Approximately 1/4 quart
You Might Also Love


Frequently Asked Questions
People Also Search For:

About the Author
Jannet Lisa is a certified culinary professional with over 10 years of experience in recipe development and food styling. She has worked with major food brands and her recipes have been featured in various culinary publications.
500+ Recipes Created Culinary Arts Graduate Recipe Tested & Verified


Leave a Reply