Key Takeaways
- Complete recipe with step-by-step instructions
- Nutritional information included
- Tips for best results
- Storage and reheating guidelines
Published: July 14, 2025 |
Last Updated: July 14, 2025 |
Prep Time: See recipe below
Quick Recipe Overview
Prep: 30 min
Cook: 45 min
Serves: 8
Difficulty: Easy
A Pupusa Recipe has been a staple in my kitchen ever since I first tasted these extraordinary Salvadoran delights during a backpacking trip through Central America. I remember biting into a warm, cheesy pupusa for the first time, the masa perfectly crisp on the outside and the savory filling melting in my mouth. That experience inspired me to recreate that magic at home. This particular authentic Salvadoran pupusa recipe takes me right back to those vibrant street food stalls, with the comforting aroma of corn masa and bubbling cheese filling the air. It’s a indeed satisfying dish, just right for a quick weeknight dinner or a fun weekend project. Don’t worry if it takes a few tries to get the hang of it; the delicious reward is worth every effort! Let’s get cooking this easy homemade pupusa recipe!
Why You’ll Love This Pupusa Recipe
I know you’ll completely adore this pupusa recipe for so many reasons. It’s honestly a delight to make and even better to eat!
- These pupusas offer exceptional, comforting flavors that transport you straight to El Salvador.
- It’s a surprisingly quick and easy homemade pupusa recipe, ideal for busy weeknights.
- You’ll appreciate how budget-friendly this dish is, using simple, wholesome ingredients.
- Pupusas are a fantastic way to get creative in the kitchen and customize fillings to your liking.
- This easy homemade pupusa recipe is a great option for feeding the whole family, even picky eaters.
- They make for a fun, interactive cooking experience that everyone can enjoy.
Ingredients for Your Pupusa Recipe
Gathering the right ingredients is the first step to making your delicious pupusa recipe a reality. I’ve carefully selected each component to ensure authentic flavor and excellent texture.
- 3 cups masa harina – This is key for the dough, providing that distinct corn flavor and texture. It’s the foundation of your pupusa masa.
- 2 tsp salt – For seasoning the dough, balancing the flavors.
- 2 3/4 cups warm water – Essential for hydrating the masa harina to create a pliable dough.
- 2 tbsp avocado oil (or oil of choice; for frying) – For cooking the pupusas to a golden perfection.
- 15 oz. refried beans – The base for your savory filling.
- 1 packet chicken seasoning (preferably Goya) – Adds a punch of savory flavor to the bean filling.
- 1 cup mozzarella cheese (shredded) – For that mouthwatering gooey, cheesy center.
- 1/2 head green cabbage (sliced) – The star of the tangy curtido.
- 1 large carrot (peeled and sliced thinly or use 1/2 cup pre-shredded carrots) – Adds sweetness and crunch to the curtido.
- 1/2 onion (thinly sliced) – Aromatic base for the curtido.
- salt to taste – For seasoning the curtido.
- 1/2 cup white vinegar (or apple cider vinegar) – Provides the essential tang for the curtido.
- 1/2 cup boiling water (or more) – Used to soften the cabbage for the curtido.
How to Make Pupusas at Home
Learning how to make pupusas at home might seem a little daunting at first, but I promise it’s a super rewarding process. Just follow these steps, and you’ll be enjoying your own homemade Salvadoran delights in no time. This detailed pupusa preparation guide will walk you through each part, from the tangy curtido to the perfectly cooked pupusa.
- Step 1: Start by making the curtido. Bring a large pot of water to a boil, then add the sliced cabbage and boil it until it’s soft, which usually takes about 5-7 minutes. Reserve 1/2 cup of the water, then drain the rest. Transfer the softened cabbage to a bowl and add the carrot, onion, a pinch of salt, white vinegar, and the reserved hot water. Stir everything together and allow this mixture to sit and develop its flavors while you prepare the pupusas.
- Step 2: Next, prepare your delicious filling. In a separate bowl, combine the refried beans, chicken seasoning, and shredded mozzarella cheese. Stir well until everything is thoroughly mixed. Set this flavorful filling aside for later.
- Step 3: Now, it’s time to make the masa dough. In a large mixing bowl, combine the masa harina and salt. Begin adding the warm water, about 1 cup at a time, using your hands to mix everything together. Continue adding water until the dough forms and feels similar to soft play-doh – pliable and not too sticky. This is crucial for successful pupusa preparation.
- Step 4: Let’s assemble the pupusas! Grab a small handful of the prepared dough and use your palms to gently flatten it into a disc, about 3-4 inches in diameter. Use your fingers to lift the edges up slightly, creating a shallow cup shape. Add 1-2 tablespoons of your bean and cheese filling into the center of this dough cup. Carefully fold the sides of the dough up and over the filling, sealing it completely to form a ball. Then, gently use your palms to flatten the ball back out into a disc, about 1/2 inch thick. Don’t worry if it’s not perfectly round; this process takes a bit of practice to get just right! Repeat this process until all of your bean mixture is used up.
- Step 5: Heat 1 tablespoon of avocado oil in a cast iron skillet (or any heavy-bottomed skillet) over medium heat. Once the oil shimmers, carefully place 3 pupusas into the hot skillet. Cook them for 2-3 minutes on one side until they turn a beautiful golden brown. Use a spatula to gently flip them over and cook for another 1-2 minutes on the other side until golden and cooked through. Repeat this process with all remaining pupusas, adding more oil as needed.
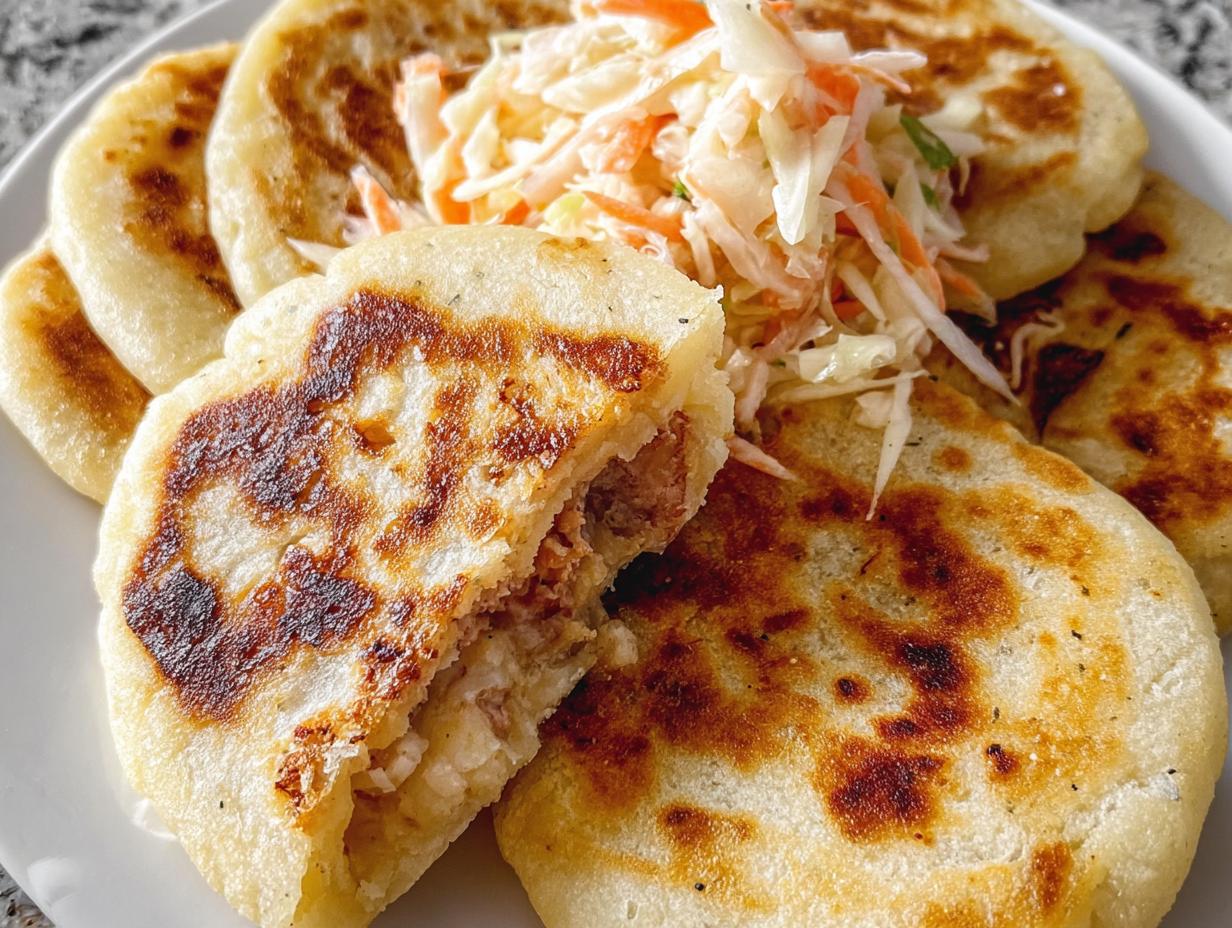
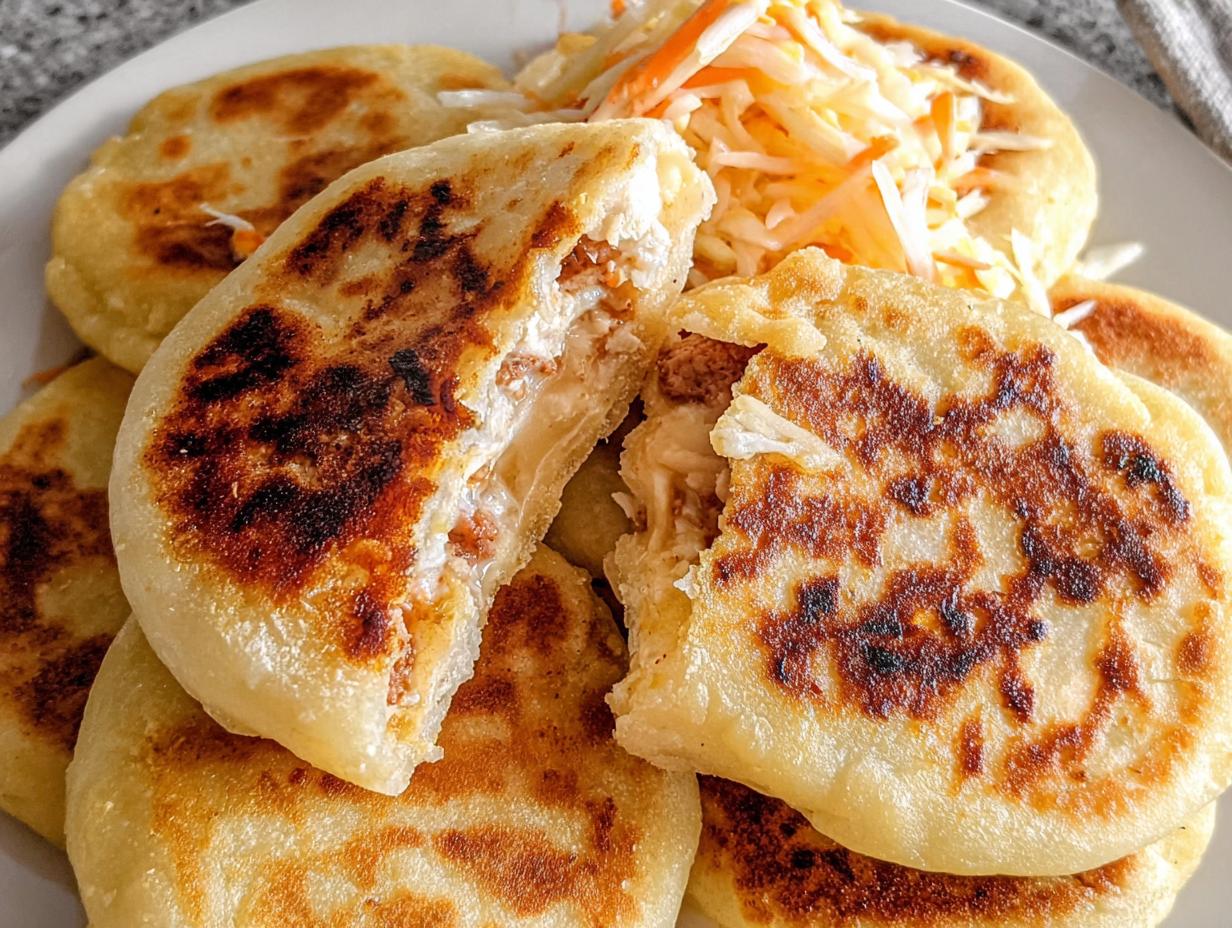
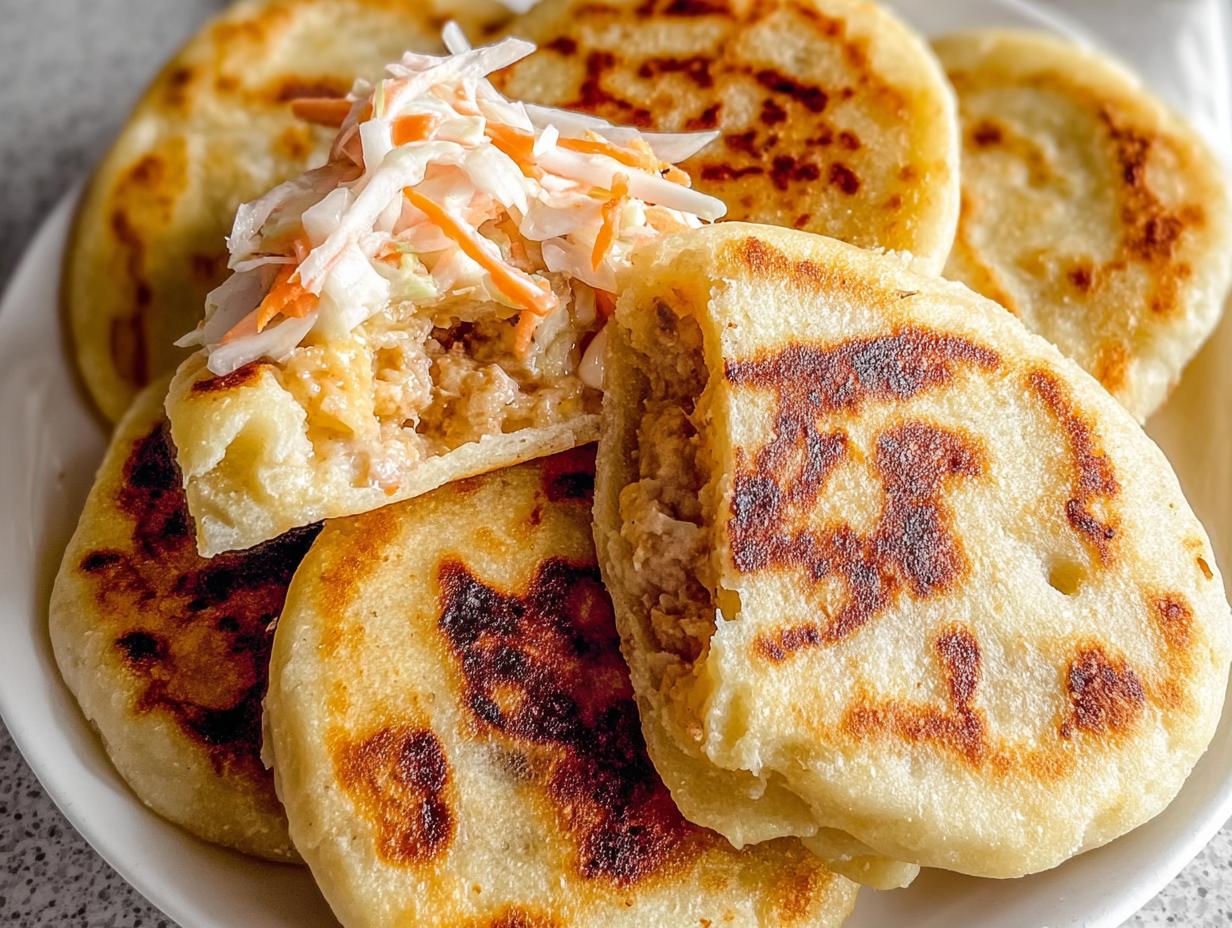
- Step 6: Serve your freshly cooked pupusas immediately with a generous topping of the prepared curtido. For an extra authentic touch, I love adding a side of salsa roja. Enjoy your homemade Salvadoran feast!
Pro Tips for the Best Pupusas
I’ve learned a few tricks over the years that will help you make the most impressive pupusas. These simple tips can really elevate your homemade batch from good to definitely impressive, ensuring great texture and flavor every time.
- Always use warm water for your masa dough; it helps hydrate the flour better for a more pliable consistency.
- Don’t overfill your pupusas, as this can make them difficult to seal and prone to cracking during cooking.
- Keep your hands slightly moistened with water or a little oil when shaping to prevent the dough from sticking.
- Cook pupusas over medium heat to ensure they cook through evenly without burning the outside.
- Let the pupusas rest for a minute or two after cooking before serving; this helps the cheese settle.
What’s the secret to optimal Pupusa preparation?
The real secret lies in the dough’s consistency. It should feel like soft play-doh – smooth, pliable, and not sticky. If it’s too dry, add a tiny bit more water; if too wet, a little more masa harina. This ensures easy pupusa making and prevents cracks.
Can I make Pupusas ahead of time?
Certainly! You can prepare the dough and filling components separately and store them in the fridge for up to 24 hours. For fully assembled pupusas, form them and refrigerate on a parchment-lined tray for a few hours before cooking. Just cover them tightly.
How do I avoid common mistakes with Pupusas?
To prevent cracking, ensure your dough is well-hydrated and pliable. If the pupusas stick, use a little oil on your hands and the cooking surface. For even cooking, don’t overcrowd the skillet, and maintain a consistent medium heat.
Best Ways to Serve Pupusas
Once you’ve mastered this pupusa recipe, the fun continues with how you serve them! I always recommend enjoying your pupusas fresh off the griddle, when they’re at their absolute best: hot, crispy, and with that wonderfully melted cheesy center.
The classic accompaniment, and one I insist you don’t skip, is a generous dollop of curtido. This tangy, fermented cabbage slaw cuts through the richness of the pupusa beautifully. For an even more authentic experience, pair your homemade pupusas with a side of salsa roja, a thin, savory tomato sauce that adds another layer of flavor. It genuinely completes the meal and transforms your delicious traditional pupusa recipe with curtido into a full Salvadoran feast!
Nutrition Facts for Your Pupusa Recipe
I know many of you are curious about the nutritional breakdown of your delicious homemade pupusa recipe. Here’s an estimate per serving, based on the ingredients used in this recipe:
- Serving Size: 1 pupusa
- Calories: 250
- Fat: 8g
- Saturated Fat: 3g
- Trans Fat: 0g
- Cholesterol: 15mg
- Sodium: 350mg
- Carbohydrates: 35g
- Fiber: 5g
- Sugar: 2g
- Protein: 10g
Nutritional values are estimates and may vary based on specific ingredients, brands, and preparation methods used.
How to Store and Reheat Pupusas
Once you’ve made a batch of these delicious pupusas, you might find yourself with a few leftovers – lucky you! Proper storage is key to keeping them fresh. Allow any cooked pupusas to cool completely to room temperature before storing them. Once cool, place them in an airtight container or a resealable freezer bag. They will keep well in the refrigerator for 3-4 days.
For longer storage, pupusas freeze beautifully! Individually wrap each cooled pupusa in plastic wrap, then place them in a freezer-safe bag or container. They can be frozen for up to 3 months. When you’re ready to enjoy them again, these simple pupusa instructions for reheating will ensure they taste just as good as fresh. For refrigerated pupusas, reheat them in a dry skillet over medium heat for a few minutes per side until warmed through and slightly crispy. From frozen, you can reheat them directly in a skillet over low heat, or in a 350°F (175°C) oven until hot and crisp, about 10-15 minutes.
Frequently Asked Questions About Pupusas
What is the best pupusa recipe?
While “best” is subjective, I actually believe this pupusa recipe is fantastic for beginners and experienced cooks alike. It balances authentic flavors with straightforward steps, ensuring a delicious and satisfying result every time. The combination of easy-to-find ingredients and clear instructions makes it my go-to for homemade pupusas.
Why are my pupusas cracking?
Cracking is a common issue, and it usually means your masa dough is too dry. The key is a pliable, play-doh like consistency. If your dough cracks when you try to flatten it, add a tablespoon of warm water at a time and knead until it’s smooth and elastic. Also, ensure your hands are slightly damp when shaping to prevent sticking and tearing.
How long does it take to cook pupusas?
Cooking pupusas is surprisingly quick! Once assembled, each pupusa typically takes about 2-3 minutes per side in a hot skillet. So, if you’re cooking them in batches of three, you can expect each batch to be ready in about 5-6 minutes. The total time will depend on how many you’re making, but the individual cooking time for each is very efficient.
Can I use different fillings in this pupusa recipe?
Indeed! This pupusa recipe is incredibly versatile. While bean and cheese is a classic, you can experiment with fillings like loroco (an edible flower common in El Salvador), shredded pork or chicken, or even just cheese. Just make sure your filling isn’t too wet, as that can make shaping difficult.
Variations of Pupusas You Can Try
One of the things I love most about this pupusa recipe is how incredibly adaptable it is! Once you’ve mastered the basic technique, you can really get creative with the fillings and even the cooking methods. Don’t feel limited to just the classic bean and cheese pupusas; there’s a whole world of flavor to explore.
- Vegan Pupusas: Easily make these plant-based by using a dairy-free cheese alternative and ensuring your refried beans are vegetarian. You can also fill them with just seasoned black beans or even mashed sweet potato for a different twist.
- Loroco Pupusas: For an authentic Salvadoran experience, seek out loroco, an edible flower bud. Mix it with cheese for a traditional and original flavor that’s incredibly popular in El Salvador.
- Pork or Chicken Pupusas: Shredded, seasoned pork (chicharrón) or chicken can be mixed with cheese or refried beans for a heartier, meaty option. Just make sure the meat is finely shredded so it doesn’t tear the masa.
- Baked Pupusas: While traditionally pan-fried, you can bake pupusas for a lighter option. Preheat your oven to 400°F (200°C), lightly brush the pupusas with oil, and bake for 15-20 minutes, flipping halfway, until golden.

Pupusa Recipe: 1 amazing taste journey in 5 steps
- Total Time: 60 minutes
- Yield: 14 servings 1x
- Diet: Vegetarian
Description
This easy Pupusa Recipe teaches you how to make bean and cheese-filled tortillas. Pupusas are simple to customize and typically served with curtido for a tasty lunch, dinner, or snack.
Ingredients
- 3 cups masa harina
- 2 tsp salt
- 2 3/4 cups warm water
- 2 tbsp avocado oil (or oil of choice; for frying)
- 15 oz. refried beans
- 1 packet chicken seasoning (preferably Goya)
- 1 cups mozzarella cheese (shredded)
- 1/2 head green cabbage (sliced)
- 1 large carrot (peeled and sliced thinly or use 1/2 cup pre-shredded carrots)
- 1/2 onion (thinly sliced)
- salt to taste
- 1/2 cup white vinegar (or apple cider vinegar)
- 1/2 cup boiling water (or more)
Instructions
- Start by making the curtido: bring a large pot of water to a boil, then add the cabbage and boil it until soft; reserve 1/2 cup of the water, then drain the rest. Transfer the cabbage to a bowl and add the carrot, onion, salt, vinegar, and the reserved hot water. Allow the mixture to sit while you prepare the pupusas.
- Next, make the filling: stir the refried beans, chicken seasoning and cheese together in a bowl; set aside.
- Next, make the dough: add the masa and salt to a large mixing bowl, then add the water in 1 cup at a time, using your hands to stir everything together to form the dough. Once all of the water has been added, the dough should feel similar to play-doh.
- Now, it’s time to assemble the pupusas! Grab a small handful of the dough and use your palms to flatten it into a disc. Use your fingers to lift the edges up a bit so it resembles a shallow cup, then add 1-2 tablespoons of the bean mixture into the center. Fold the sides up so that the dough forms a ball, then use your palms to flatten it back out into a disc. It’s ok if it isn’t perfect! This process takes several tries to get right. Repeat this process until all of the bean mixture is used up.
- Heat 1 tablespoon of oil in a cast iron skillet (or heavy bottomed skillet) over medium heat. Add 3 pupusas and cook them for 2-3 minutes, then use a spatula to flip them over and cook for 1-2 minutes until they’re golden on the outside. Repeat this process with all of the pupusas.
- Serve pupusas with curtido on top (and salsa roja, if available) and enjoy!
Notes
- This pupusa recipe is easy to customize.
- The process of assembling pupusas takes practice.
- Serve pupusas with curtido and optional salsa roja.
- Prep Time: 50 minutes
- Cook Time: 10 minutes
- Category: Dinner
- Method: Pan Frying
- Cuisine: Salvadoran
Nutrition
- Serving Size: 1 pupusa
- Calories: 250
- Sugar: 2g
- Sodium: 350mg
- Fat: 8g
- Saturated Fat: 3g
- Unsaturated Fat: 4g
- Trans Fat: 0g
- Carbohydrates: 35g
- Fiber: 5g
- Protein: 10g
- Cholesterol: 15mg





Leave a Reply